Saturday, May 2, 2015

Mother's Day Watermelon Sangria

Enjoy a special Treat Just for Mom this Sunday on Mom's special Day, Mother's Day ! 


"Fresh watermelon sangria is like summertime in a glass. Just blend watermelon into a juice, and pour over fresh fruit along with white wine, vodka, and orange liquor."


INGREDIENTS:
12 cups cubed watermelon, divided
1 (750 milliliter) bottle dry white wine
1 cup vodka
1/2 cup triple sec
1/2 cup simple syrup
1 medium lime, quartered
1 orange, cut into wedges
1 cup fresh blueberries


DIRECTIONS:
1.Place 9 cups of watermelon cubes in a blender; blend on high until very smooth. Strain juice through a mesh strainer into a large pitcher. Pour the wine, vodka, triple sec, and simple syrup into the pitcher. Stir to combine. Mix the remaining 3 cups of watermelon cubes, the lime quarters, orange sections, and blueberries into the sangria. Chill for 4 hours before serving.

Source: Allrecipes.com

Wednesday, April 1, 2015

All Natural Haroset

My husband may this recipe a few years ago as his version on Haroset and I love it.  It is so delicious I could eat it all year round, but he only makes it for me during passover.  So I learned the recipe and now I can make it myself.  Just like everything else I cook, it is super easy. 

Start with your ingredients. Apples, dates and figs are the staple, then I added raisins, walnuts, almond slivers, and sunflower seeds.  Really any nuts/seeds combo works. 


Step 1: 
Dice up all your ingredients and throw them in a bowl or container 


Step 2: 
Add Spices: 
2 small dashes of cayenne pepper
Cover ingredients with cinnamon 
a few dashes of Ginger Powder
a few dashes of salt

Step 3: 
Coat with honey and put in about a 1/4 cup of red wine, any open bottle will do :) 

Step 4: 
Place lid on container and shake it up 
Let the Haroset sit over night and it is ready to eat. 


ENJOY!! 

Got an easy recipe that you love and want to share, 
please email them to abbie@strollersessions.com.

If you make what we post, tell us about it!  

#byebyebabyweight 
#borntoburpee

~Abbie


Sunday, March 29, 2015

Creamy Avocado, Artichoke & Kale Dip

CREAMY AVOCADO, ARTICHOKE & KALE DIP
 
Prep time
Cook time
Total time
 
Recipe type: Appetizer, Dip
Serves: 6-8
Ingredients
  • 2 cups chopped curly kale
  • ½ tablespoon olive oil
  • 1 14-ounce can whole artichoke hearts, drained
  • 2 small avocados
  • 2 tablespoons fresh lemon juice
  • 16 oz of sour cream 
  • 1 pack of Vegetable Soup Mix
  • 1 garlic clove, minced
  • ¼ teaspoon sea salt
  • black pepper, to taste
Serving Ideas
  • tortilla chips
  • pita chips
  • rice crackers
  • sliced vegetables

Instructions
  1. Add the kale and olive oil to a skillet over medium-low heat. Cook the kale until it wilts and becomes tender, stirring occasionally (5-6 minutes). Transfer the kale to a cutting board and chop into small pieces. Let cool.
  2. While the kale is cooking, quarter the artichoke hearts.
  3. Transfer the avocado, kale, and artichoke hearts to a bowl and gently mix together with a spoon while adding sour cream and dry vegetable soup mix.
  4. Transfer the dip to a serving dish. Serve alongside tortilla chips, pita chips, rice crackers, or sliced vegetables.
  5. This dip is best enjoyed fresh, but will keep for 1-2 days in the refrigerator. Store leftovers in an airtight container with a layer of plastic wrap pressed up against the dip to prevent browning.

Source: 

Monday, March 23, 2015

#MMHM How to Start a Vegetable Garden!

This weeks #MMHM comes from Real Estate by Katie Kincade! With the weather starting to warm up and the kids wanting to play outside, what better way to keep them busy is with a project, a healthy one at that! A vegetable garden is a lot fun to grow and you get to grow your own vegetables! Check out the link below to learn how to get started! 
Starting a vegetable garden can be both exciting and intimidating, particularly if you’ve never attempted to grow your own food before. Anyone can grow vegetables, however, even if they have just a small amount of yard or balcony space. Getting started is quite simple.


How to Start a Vegetable Garden
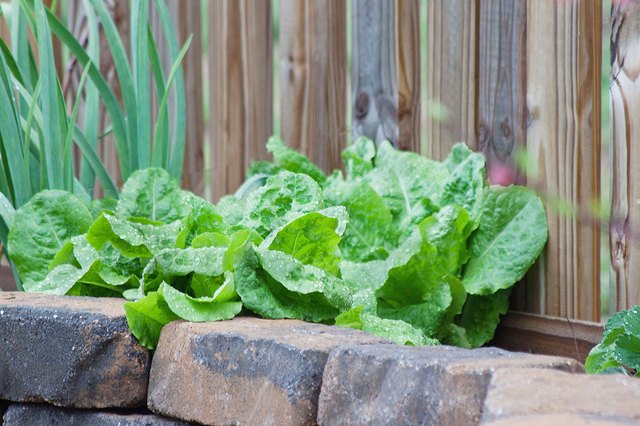
How to Start a Vegetable Garden (Santy Gibson/Demand Media)
Choose a Sunny Location
The most important aspect of starting a vegetable garden is selecting the best possible location for it. The general rule of thumb is that a vegetable garden must be in a location that receives a minimum of six full hours of direct sunlight each day. In reality, that rule is adjustable based on your growing geography and the types of vegetables you plan to have in your garden. Leafy greens, for instance, can grow in filtered sunlight or light shade. Plants that produce actual fruit, however, require bright light. Full sunlight is recommended, but bright reflected light works as well.
Geography is important because sunlight is stronger in some locations of the country than in others. Six full hours of sunlight in Arizona in July can kill many vegetable plants yet be barely strong enough for plants to produce fruit in an area where the sunlight is weaker, such as Michigan.


(Santy Gibson/Demand Media)
Purchase Supplies
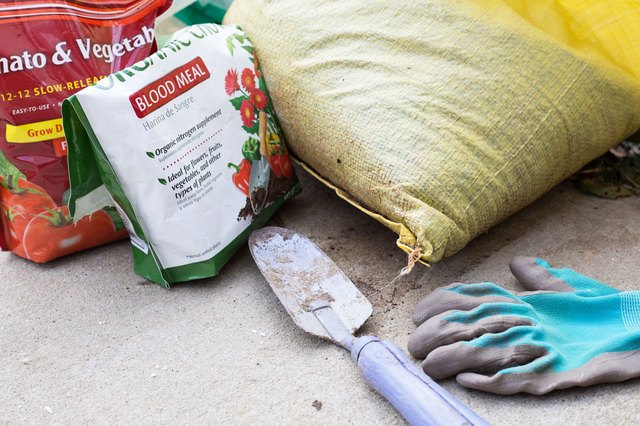
The basic supplies needed to start your vegetable garden include seeds and/or starter plants. Compost is recommended because it helps a garden get the best start possible, and it may negate the need for plant food, or fertilizer, during the growing season.
Purchasing vegetable seeds is the most economical way to begin, but some vegetables take a very long time to produce when grown from seeds. Many varieties of tomato plants (Solanum lycopersicum ), for instance, need five months of growth before their fruit can be harvested. If your location's growing season does not last very long, then purchase starter seedlings instead of seeds.


(Santy Gibson/Demand Media)
Prepare the Area
In the United States, most vegetables are grown during the warm summer months. That means you do not need to prepare your planting area until all danger of frost has passed and the ground is not too frozen or wet to be worked.
A vegetable garden site can be prepared in one of several ways, and opinions vary about which way is the best. Two popular methods are double digging and creating a raised bed. Double digging a garden area involves a lot of upfront, physical labor while creating a raised bed can be as simple as laying several inches of compost. Both methods have the same goal, however: Create a garden bed that has loose, fertile soil that is free of weeds, rock and other debris.
In order to accomplish that with the double-digging method, dig at least two shovelfuls deep into the ground, and mix fertilizer and compost with the soil as you proceed. If you want to use the raised-bed method instead, then spread at least a 6-inch-deep layer of a soil and compost mixture on top of the ground where you want the vegetable garden to grow. Creating border walls around the garden bed by using rocks, logs or boards keeps the site neat and contained.


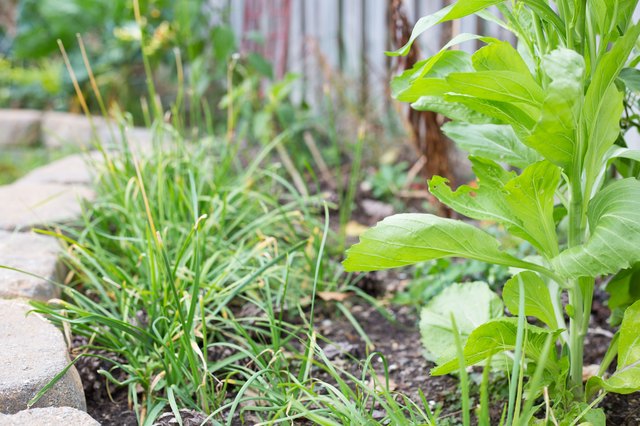
(Santy Gibson/Demand Media)
Plant Seeds and Starters
Small vegetable gardens are often planted in squares so that everything in them is easily accessible from around the squares' edges. Large gardens are planted in rows to make their planting and ongoing maintenance efficient. Choose your layout method, and mark the squares or rows with string and stakes.
For row planting, put your seeds or starter seedlings into the soil at the recommended spacing distance noted on the seed packets or plant care tags. If you’d like to plant in squares, add the plant spacing and row spacing amounts, and then divide the result by two. For example, leaf lettuce plants (Lactuca sativa) are planted 6 inches apart in rows that are 18 inches apart, and so they can be planted 12 inches from each other in a square layout.
Gently water the newly planted soil to ensure it packs firmly around the seeds or starter seedlings.


(Santy Gibson/Demand Media)
Provide Ongoing Care
A vegetable garden thrives with ongoing care, which usually consists of adding water and removing weeds.
Water your garden once each week if it has not received any rain. Press your finger 1 inch into the soil to determine whether or not it needs water. When the top 1 inch of soil is dry, that is an indicator that it needs water. Add enough water to moisten the soil to at least a 6-inch depth.. By ensuring that the moisture goes 6 inches deep or farther, you’ll encourage stronger root growth from your plants.
Remove weeds from your vegetable garden so that they do not take water and nutrients from the soil that your vegetables need.
Some kinds of vegetables may need additional fertilizer part way through the growing period. Because these needs vary greatly, refer to specific instructions for your plants.


(Santy Gibson/Demand Media)


Read more : http://www.ehow.com/how_110539_start-vegetable-garden.html

Wednesday, March 4, 2015

Eggs in Purgatory

Another Snow Day? Looks like that may be our fate tomorrow...again. Here is a super easy, yummy, and healthy recipe that will feed the whole family. This is a go to recipe for me, especially when I want something quick. Chances are, you already have everything you need on hand.

This recipe is easily adaptable for any size family. I go with 2 eggs per person for adults and one per child and just adjust the size of the skillet I use accordingly. I have adapted this recipe throughout the years to our liking, but get creative, you can add almost anything to this!

Serve with some great quality crusty bread and enjoy!


Eggs in Purgatory

This recipe will serve 1

      1 tablespoon olive oil
      1/4 of an onion, chopped
      1 clove garlic chopped
      1/4 teaspoon red pepper flakes
      1/4 teaspoon Italian seasoning
      1 x 14 oz can crushed tomatoes
      1 tablespoon tomato paste
      1/8 cup red wine
      ½ teaspoon kosher salt (or to taste)
     1-2 large egg
     1 tablespoon chopped basil
     2 teaspoons grated Parmesan (or more as needed)
     1 splash of chili oil or hot sauce  (optional to serve)
    2 slices white bread (or other bread of your choice to serve

  1. Pour the olive oil into a frying pan or cast iron skillet, then grate in (or mince and add) the garlic and the chopped onion, scatter in the chili flakes and Italian seasoning and put the pan over a medium heat, stirring, for 2 minutes.
  2. Once the onions and garlic are fragrant add in the tomato paste and stir for 1 minute, then deglaze with red wine. If you don't want to use red wine you can skip all together.
  3. Add in tomatoes, basil, salt, and let it come to a bubble. It’s got to be hot enough to poach an egg in.
  4. Crack in the egg (or eggs) leaving them sitting right on top, cover with foil leaving one area open so everything doesn't steam. Let it bubble for 5 minutes, by which time the white should be set and the yolk still runny, let cook longer if you like a hard yolk.
  5. Remove from the heat, sprinkle with Parmesan cheese, fresh basil or parsley, chili oil or a dash of hot sauce, and serve

Tuesday, March 3, 2015

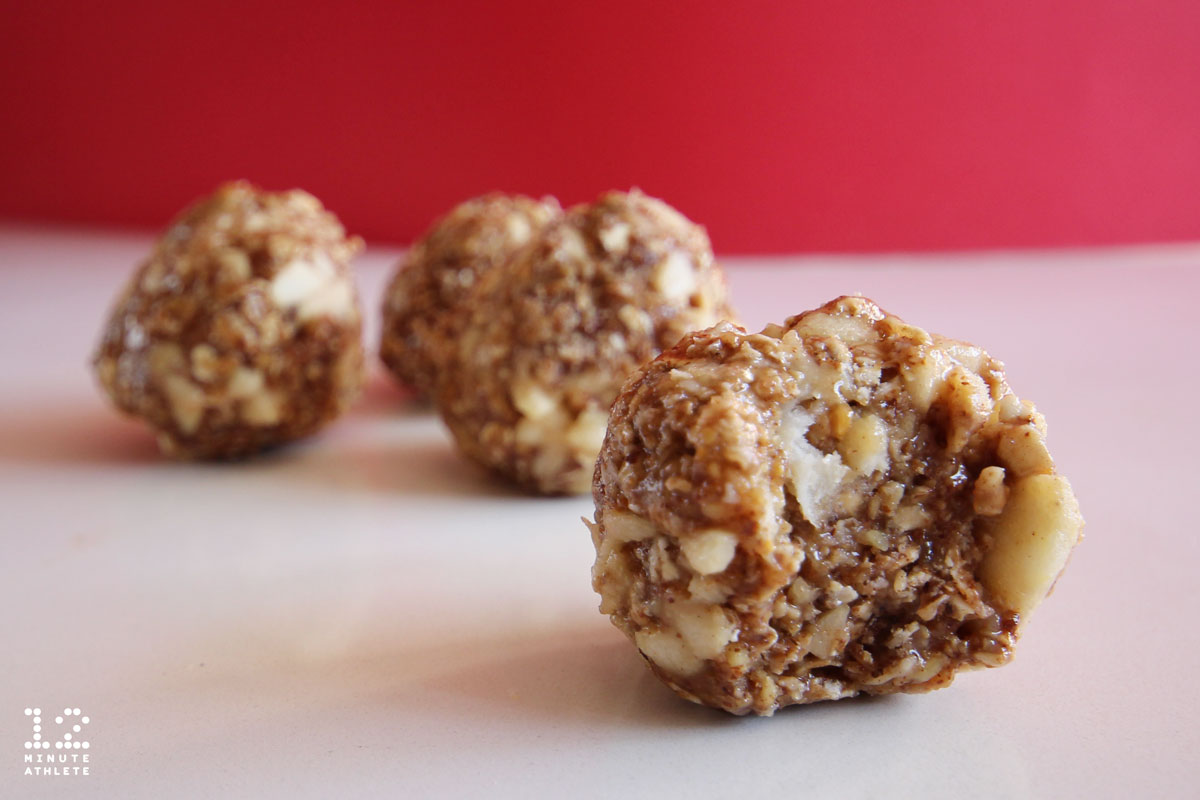
Apple Pie Energy Bites

Whether you need a quick breakfast, a pre-workout meal, or an easy snack, sometimes you just need something that’s sweet, healthy, and satisfying, all in one.
That’s where these apple pie energy bites come in. The oats, apple, and honey will give you energy, and the almond butter and protein powder will help you stay full for more than two minutes.
Plus, they’re easy to make and since you can store them in a freezer, are ready to go whenever you need a quick bite!
Here’s your Apple Pie Energy Bite recipe:

Ingredients:

1 cup oatmeal
1 scoop cinnamon or vanilla protein powder
1 small apple, diced really small
1/4 cup unsweetened almond butter
2 Tbsp honey
1 1/2 tsp cinnamon
1/2 tsp nutmeg
Total prep time: 20 minutes

Directions:

Dice your apple up really small (just pretend you’re chopping an onion), then mix the apple along with the other ingredients in a medium sized bowl.
Make sure to stir everything together really well—the last thing you want is to take a bite of dry oatmeal (or worse, a giant clump of cinnamon or nutmeg) when you’re eating one of these.
If the mixture isn’t sticking together quite right, just add a little more almond butter or honey until it’s sticky enough you can mold it into small 1-2″ balls.
Place the energy bites on parchment paper and stick them in the freezer, wait 30-60 minutes, and eat! You can also put them in the fridge instead and eat them fresh after chilling them for an hour or so, but I like them best frozen.

apple pie energy bites

Macros (per 1/9 recipe):
Calories: 107
Protein: 5.3g
Carbohydrates: 13g
Fat: 4.2g
Fiber: 2g
Source: 12MinuteAthlete

Get Fit For Spring: 30 days for $47

30daysfor$47
 It is not too late to Get Fit for Spring!  Get back on track with unlimited Stroller Sessions and Tribe Flow Yoga in March for ONLY $47.  Space is limited so ACT NOW to Get Started.  Either email abbie@strollersessions.com to reserve your space or Click Here to sign up online. The $47 is good for 30 days when you sign up during the month of March.
Stroller Sessions is the Premier Moms Fitness Group that meets every Tuesday and Friday starting at 9:30am inside the Kaiserman JCC  located at 45 Haverford Ave, Wynnewood. During our sessions we offer a 45 minute kick butt interval workout.  Kids of all ages welcomed; Strollers are optional.
With your monthly unlimited you receive the following:
  • 8 Strollers Sessions (two days a week)
  • 4 Tribe Flow Yoga sessions on Sundays @ 9:00am at Fit Tribe in Havertown (no kids) ( 4 – 60 minute Sessions a month)
Sign me up!  I am ready to get started.

10 Tips to Overcome a Weight-Loss Plateau


 So you stopped drinking soda and bringing ice cream into the house, and the weight started to peel off. This boosted your confidence, so you joined a gym to burn some extra calories on the stationary bike. All of your efforts paid off and you lost weight, possibly even a lot of weight … well, for a while. But now you feel stuck; you feel as if you’ve reached a weight-loss plateau.
Possibly you’re at a healthy weight, albeit above your dream weight, but those pesky 5-10-15 pounds are still lingering. Why? Are you just dreaming too big and searching for something that is out of reach? If you’re at a healthy weight, this might be because the body likes to maintain a stable weight, also known as set-point weight. While your body’s set point can be adjusted, it can take some time to get there.
As you are losing weight, it can be tempting to cut calories too low to shed pounds faster. The down side to this technique: your muscle can be used as energy and this gradually slows your metabolism to spare energy. Whether you find yourself above your body’s natural set-point weight or if you’re hard pressed to lose those vanity pounds, here are 10 ways to overcome a weight-loss plateau.
1. Adjust your calorie intake. As you lose weight, your metabolism can drop because your body requires less calories or “energy” to fuel a smaller you. The calorie intake that you initially had when you began your weight-loss journey will need to be adjusted to match your body’s current needs for weight loss. Make sure to revise your calorie goal in MyFitnessPal every 10 pounds or so.
2. Focus on quality. Busting through a weight-loss plateau is more than calories in and calories out. Processed foods won’t cut it anymore, thus quality whole foods like vegetables, beans, high-fiber fruits and lean proteins are needed for your engine to burn body fat.
3. Rotate your routine. Slugging away on the treadmill for the past four months? It’s time to change up your workouts. The muscles become familiar with the same old workout, making your regular routine less effective. To see a change in body fat, you have to get outside of your fitness comfort zone. High Intensity Interval Training (HIIT) has been shown to burn body fat effectively. Try doing speed work at the track, a boot camp class at the gym, or alternate walking and running intervals. Note: Just progress slowly and deliberately when incorporating high-intensity exercise into your routine. Doing too much too fast can leave you too sore, tired or even injured.
4. Beware of clean-up duty. An extra bite here, a little nibble there. Those calories DO count, even if they aren’t on your plate. Mindlessly munching on the kids’ (or spouse’s) leftovers during clean up seems harmless, but resist the snack urge because it might be what’s keeping you from seeing results.
5. Know your numbers. If you’ve been watching what you eat and exercising more and your weight is not budging, consult with your doctor to rule out any underlying medical conditions that could make it difficult for you to lose weight.
6. Sleep. A full night’s sleep is vital to losing body fat because it resets your hormones. Even a little sleep deprivation can lead to increased cortisol, a stress hormone. Elevated cortisol levels can lead to body fat accumulation around the midsection.
7. Keep a closer eye on your caloric needs. Research has shown that people often overestimate how many calories they burn during exercise, and underestimate how many calories they eat. To better approximate your caloric needs, use the MyFitnessPal basal metabolic rate calculator to learn how many calories you burn a day if you did nothing but rest for 24 hours. Use your basal metabolic rate as a benchmark to subtract the approximate number of calories burned during activity. Keep in mind that the number of calories burned during activity can vary.
8. Flush with fluids. Keep your hydration in check since the body will often crave food when you are even mildly dehydrated. Symptoms of dehydration are similar to symptoms of hunger, so it’s easy to confuse the two. Aim to drink 80-100 fluid ounces (2.35 liters) of water per day plus additional fluids lost during activity.
9. Increase muscle mass. Want to burn more calories at rest? Lift (heavier) weights and follow a strength-training program to build muscle. The more muscle you have, the more calories you burn, and the more body fat you’ll shed.
10. Eat more protein. Protein has the highest thermic effect of food, meaning eating protein burns more calories during digestion. Protein also contains an amino acid, leucine, that numerous research studies have identified as a potent catalyst for burning body fat.
Put these tried and true tips into action, and soon you’ll be saying, “What weight-loss plateau?”

Source: MyFitnessPal

Monday, March 2, 2015

Spring Daylight Savings – Tips to Save Your Child’s Sleep

cute little girl on morningBefore becoming a parent I looked forward to the time change…more daylight meant more “me” time every day! Enter my sensitive child whose world (and sleep) is rocked by the smallest of time shifts. Look forward no more. While the Spring change is not quite as disruptive as the Fall one, it can leave your family feeling “off” for a time. Don’t panic! Even the most sensitive children can adjust. Here are some tips to help your family prepare and survive.

• An overtired child has a harder time adjusting and coping with change. Make a special effort in the days approaching the time shift to ensure that your child gets adequate naps.
• When the clocks change be sure to head outside with your baby first thing in the morning or at least open the curtains and let in the natural light. Early morning exposure to natural light helps to set your baby’s internal clock and adjust to the change. Aim for 30 minutes of sunlight each morning for about a week following the change.
There are two ways to approach Daylight Savings. You can proceed with your day as usual, jumping straight to the new clock or, for more sensitive or overtired children, adjust gradually.
Transition Method 1: Proceed As Usual. If your child is generally well rested and not overly sensitive, you can wake up on Sunday morning and proceed as if nothing has changed. Offer meals and naps at the same times on the new clock as you were before. Keep in mind, however, that everything will feel a full hour earlier to your child (because it is!) so there is a potential for a bit of a struggle falling asleep. For example, if bedtime is usually 7 p.m. you would put baby down at 7 p.m. on the new clock but it will feel like 6 p.m. to her. As a result, she may not be quite tired at bedtime. You may need to be a bit more flexible and offer some extra support at bedtime but with this method she should adjust rather quickly – typically within a week.
Transition Method 2: Shift to the New Clock Gradually. If your baby is already overtired or tends to be more sensitive to timing, you may need to gradually adjust to the new clock. For this child I recommend splitting the difference. This means that if bedtime is typically at 7 p.m. put him to bed at 7:30 for a few days and then shift back to 7. Remember that bedtime feels a full hour early to your child so splitting the difference in this way can help minimize a bedtime struggle. With this approach you need to be sure to shift everything during the day 30 minutes later including naps and meals. So a baby who naps at noon will be napping at 12:30 for the first few days after the time change and then shift back to 12. The goal is to get back to your regular timing on the new clock within a few days.
Regardless of which approach you take, be prepared that the days and nights will feel a little strange to your baby who can’t really understand what is going on. Be prepared to offer some additional support at bedtime and don’t stress if your child doesn’t adjust quickly. While most adjust within a few days, some can take a few weeks to fully adjust! And remember that springing forward can mean daylight at bedtime which can interfere with your child’s ability to fall asleep. Don’t fall into the trap of shifting bedtime later waiting for it to grow dark. Instead, consider purchasing room darkening shades or blackout curtains to keep your little one on track.
With all these tips Daylight Savings can be something to look forward to again… Or at least something you can survive!
Erica Desper founded Confident Parenting in 2012, as a certified baby and child sleep coach offering private counseling for families in the greater Philadelphia area. Her sleep-saving approach is offered through a variety of packages, including unlimited text and email support. Erica has supported hundreds of families in and around the Philadelphia area and internationally to improve the quality of their families’ sleep. She is also mom to son, Jaiden who, as an infant, was very good at crying and not very skilled in sleeping! For more information visit www.beaconfidentparent.com.

Tuesday, February 17, 2015

The "M" List: Princess Party Recap

The M List Princess Party on February 8th was not only a major hit with our mama's but also with their little princesses! The Princess Party was held at the DanceXpress in was Narberth filled with food, hair, make-up, dress and of course, dancing! Abbie Chowansky, owner of The M List, pulled off an awesome event with the help of the fairy land!


Setting up the Princess Party!


Abbie with Princess Zoya and Prince Luka!


Food made by Mike Chrowansky and cupcakes provided by Twelve Baskets


Custom and Delicious Princess Cookies by Miss A's Cookie Trays, LLC


Cathy Acerba owner of Dancexpress


The princesses dancing!


Elsa even made an appearance to help the princesses dance!


2 Disney Chicks provided crafts!


Make-Up was done by Ruthie's Eyes Havertown


Princess hair done by Salon Charisse


Princess Clothes by Sew Much Cooler


Kimberly Barr Interior Design made an appearance!


Look at all the Princesses! It looks like they are getting ready to head to the Royal Ball!

It was great having all the mama's come out to the Princess Party,  enjoying ourselves and they all lived happily ever after.  

See you at the next event!  Yoga, Wine & More on March 26th at The Woman's Club of Bala Cynwyd.  Tickets on sale now. 

The M List